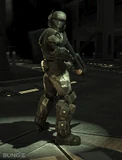
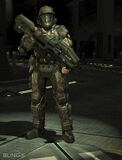
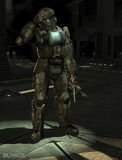
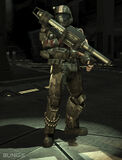
Me and my team...? Guess we're the desperate measures.
|
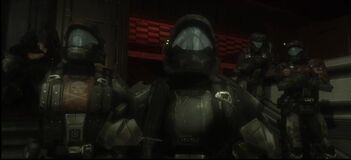
Alpha-Nine,[3] or more simply referred to as "The Squad," was a small team of six UNSC Marine Shock Troopers under the command of Gunnery Sergeant Edward Buck,[4] as part of the 65th Shock Troops Division.[5]
Squad Roster[]
- Captain Veronica Dare - An Office of Naval Intelligence operative. She assumed command of the squad right before the drop into New Mombasa. Shared an intimate relationship with Edward Buck in the past. Signature weapon is the M6S.
- Gunnery Sergeant Edward Buck - A Marine Staff Non-Commissioned Officer (SNCO). He was also the former leader of the squad. Shared an intimate relationship with Veronica Dare in the past. Signature weapon is the Assault Rifle.
- Corporal Taylor H. "Dutch" Miles - A Marine NCO that serves as the squad's Heavy Weapons Specialist. A former truck driver on Mars. Signature weapon is the Spartan Laser.
- Lance Corporal Kojo "Romeo" Agu - The squad's marksman. Known to be difficult, labeling him as the "smartass" of the squad. Signature weapon is the Sniper Rifle.
- Private First Class Michael "Mickey" Crespo - The squad's explosive ordnance expert and unofficial pilot, as well as CQC Specialist. Signature weapon is the Rocket Launcher.
- Lance Corporal "Rookie" - The newest member of the squad. Never speaks throughout the game. Signature weapon is the Silenced Submachine Gun.
Former Members[]
- Gomez[6] - KIA
- Samrat[6] - KIA
- Svensdottir[6] - KIA
- Baruti Komen[6] - KIA during the Fall of Reach
- Lance Corporal "Rookie" - KIA battling Insurrectionists
History[]
Battle of Mombasa[]
- Main article: Battle of Mombasa
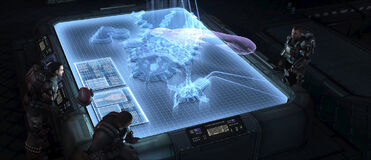
During the Battle of Earth, the squad was assigned to the UNSC Say My Name. They were a part of a larger ODST unit with the mission to board the Prophet of Regret's assault carrier, Solemn Penance, by dropping in HEVs from low orbit. Before the drop, however, ONI officer Veronica Dare took over command of the squad in order to use them in her mission to gain access to New Mombasa's Urban Infrastructure AI, the Superintendent below the city and retrieve critically important data collected by the construct. She did not, however, reveal the new mission to the squad until mid-drop, when she ordered them to alter their course towards the city's ONI Alpha Site from where they could access the Superintendent. Dare also gave the squad clearance codes to access the Superintendent's systems, allowing them to utilize the AI for assistance, such as providing a three-dimensional map of the city.
Just as they were on their way down, the carrier jumped into slipspace, releasing a devastating shockwave and an EMP which disabled the squads' drop pods' electronic systems, resulting in them be unable to control their HEVs and landing scattered around the city.
Dare and Buck landed relatively close to each other. Dare's pod hatch was jammed by the hard landing, and Buck rushed to her position in order to help her. However, Covenant forces converged on Dare's position before Buck managed to reach her. When he finally discovered her pod, he found it to be empty, just as he was confronted by a Huragok, which had Dare's severely damaged Recon helmet hanging from one of its tentacles. Suddenly a headshot killed the creature, showing Romeo waving to Buck in the distance. After assessing the situation with Romeo, Buck decided to get the squad out of the city, both him and Romeo assuming Dare had been killed.
During the rest of the day, the squad regrouped, and fought the Covenant for control of the city. Finally together, minus the Rookie and Dare, the squad fought waves of incoming Covenant on the top of the NMPD Headquarters building, where Romeo had his lung punctured by a Brute Chieftain's Gravity Hammer. The squad then made their way to Kikowani Station, where Buck injected Romeo with biofoam to temporarily stabilize his injury for several hours and to help keep him walking. They entered the station and, upon seeing that escape through the flooded train tunnels was impossible, hijacked a Phantom and flew their way out of the city. However, Buck suddenly realized he knew where Dare was, and ordered Mickey to turn back to the city.
Meanwhile, the Rookie woke up in his pod. After wandering around the city, finding several clues of what happened while he was unconscious, he received a transmission from Dare, who was pinned down in the data center below the city. The Rookie made his way to the data center, and eventually found Dare. Together, they fought their way to the Superintendent's core, where they discovered Vergil that had absorbed the Superintendent's memories into itself. As they prepared to leave, Buck arrived to the data center and they made their escape back to the surface. Traveling along the Waterfront Highway, they faced heavy Covenant resistance. Eventually, they were picked up by the Phantom piloted by Mickey. They left the city as it was glassed by the Prophet of Truth's fleet.
Approximately a month later, the squad and the Huragok were in an ONI controlled sector of the Quito Space Tether,[7] where Sergeant Avery Johnson interrogated the creature.[8]
Trivia[]
- Although the squad's members may bear a little resentment towards Dare for taking command mid-launch, it was only her course correction that saved them from being caught in the full blast of the slipspace rupture made by Regret's carrier and suffering the same fate of the other ODSTs that died in the blast.
- Some of the members of the squad bear the MK117 on their chest plate (a reference to John-117), such as Michael Crespo, Kojo Agu, and Edward Buck.
Gallery[]
Appearances[]
- Halo 3: ODST (First appearance)
- Halo: New Blood
- Halo: Bad Blood
Sources[]
- ↑ Halo: Helljumper, Issue Two
- ↑ Halo 3: ODST - YouTube - ViDoc - Desperate Measures
- ↑ Halo Waypoint - Superintendent
- ↑ Game Informer: December 2008
- ↑ Halo Legendary Crate - Bonus Item: First Twelve Hours
- ↑ 6.0 6.1 6.2 6.3 Halo: New Blood
- ↑ Halo Legendary Crate - Bonus Item: Vergil
- ↑ Halo 3: ODST - Cutscene: Legendary Ending
| ||||||||

